
Real Estate Done Right
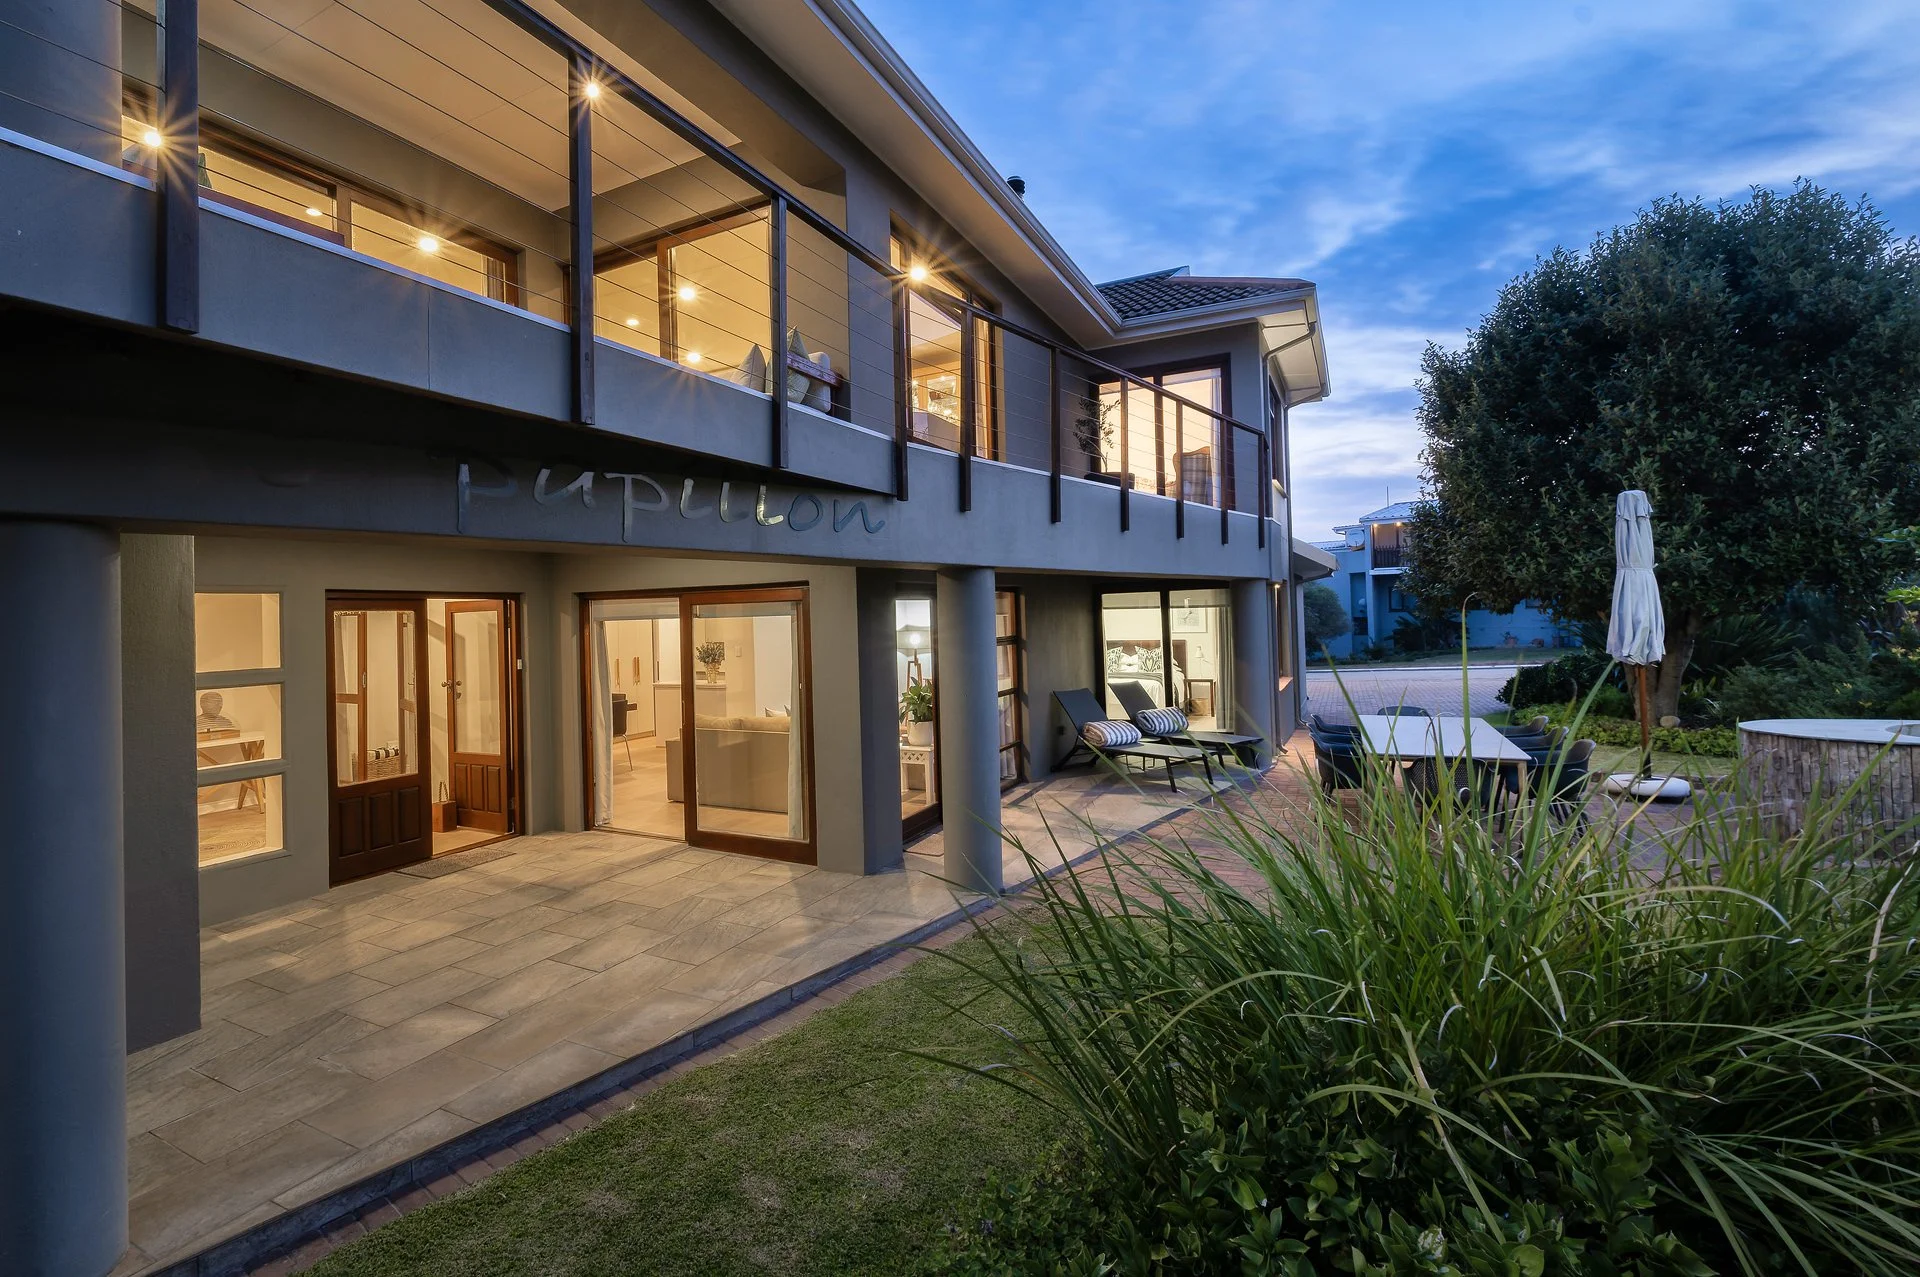
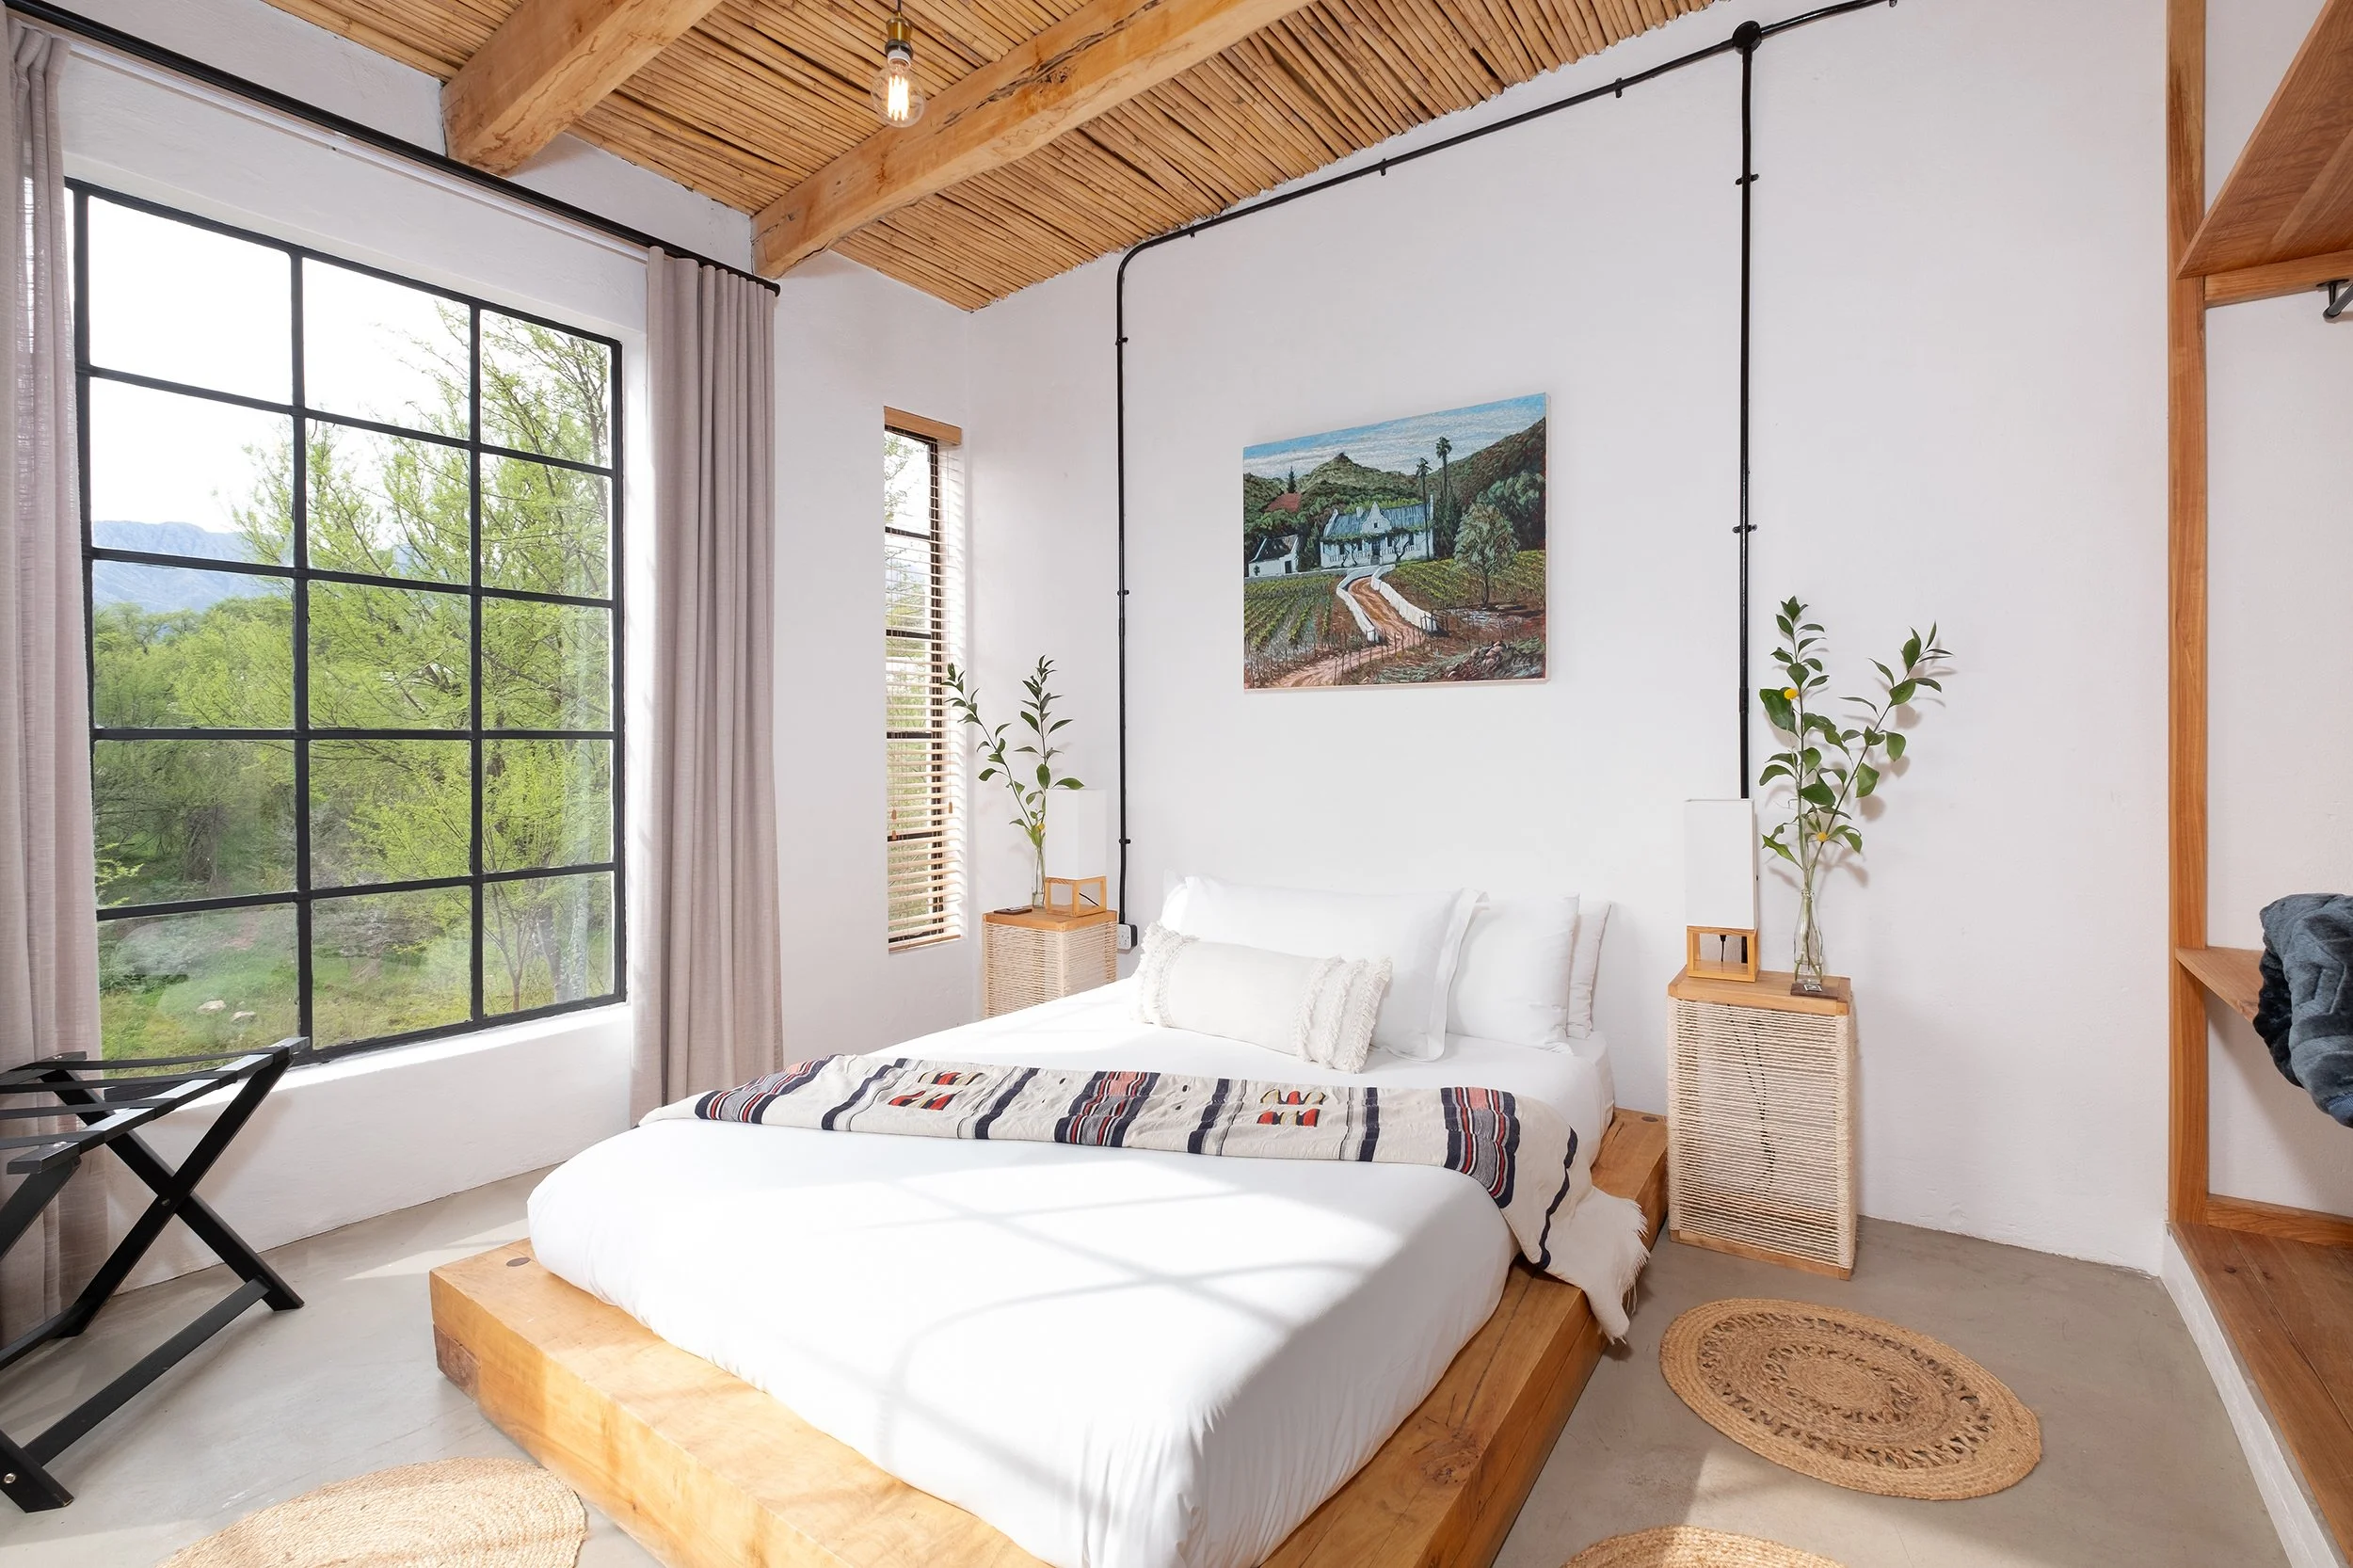
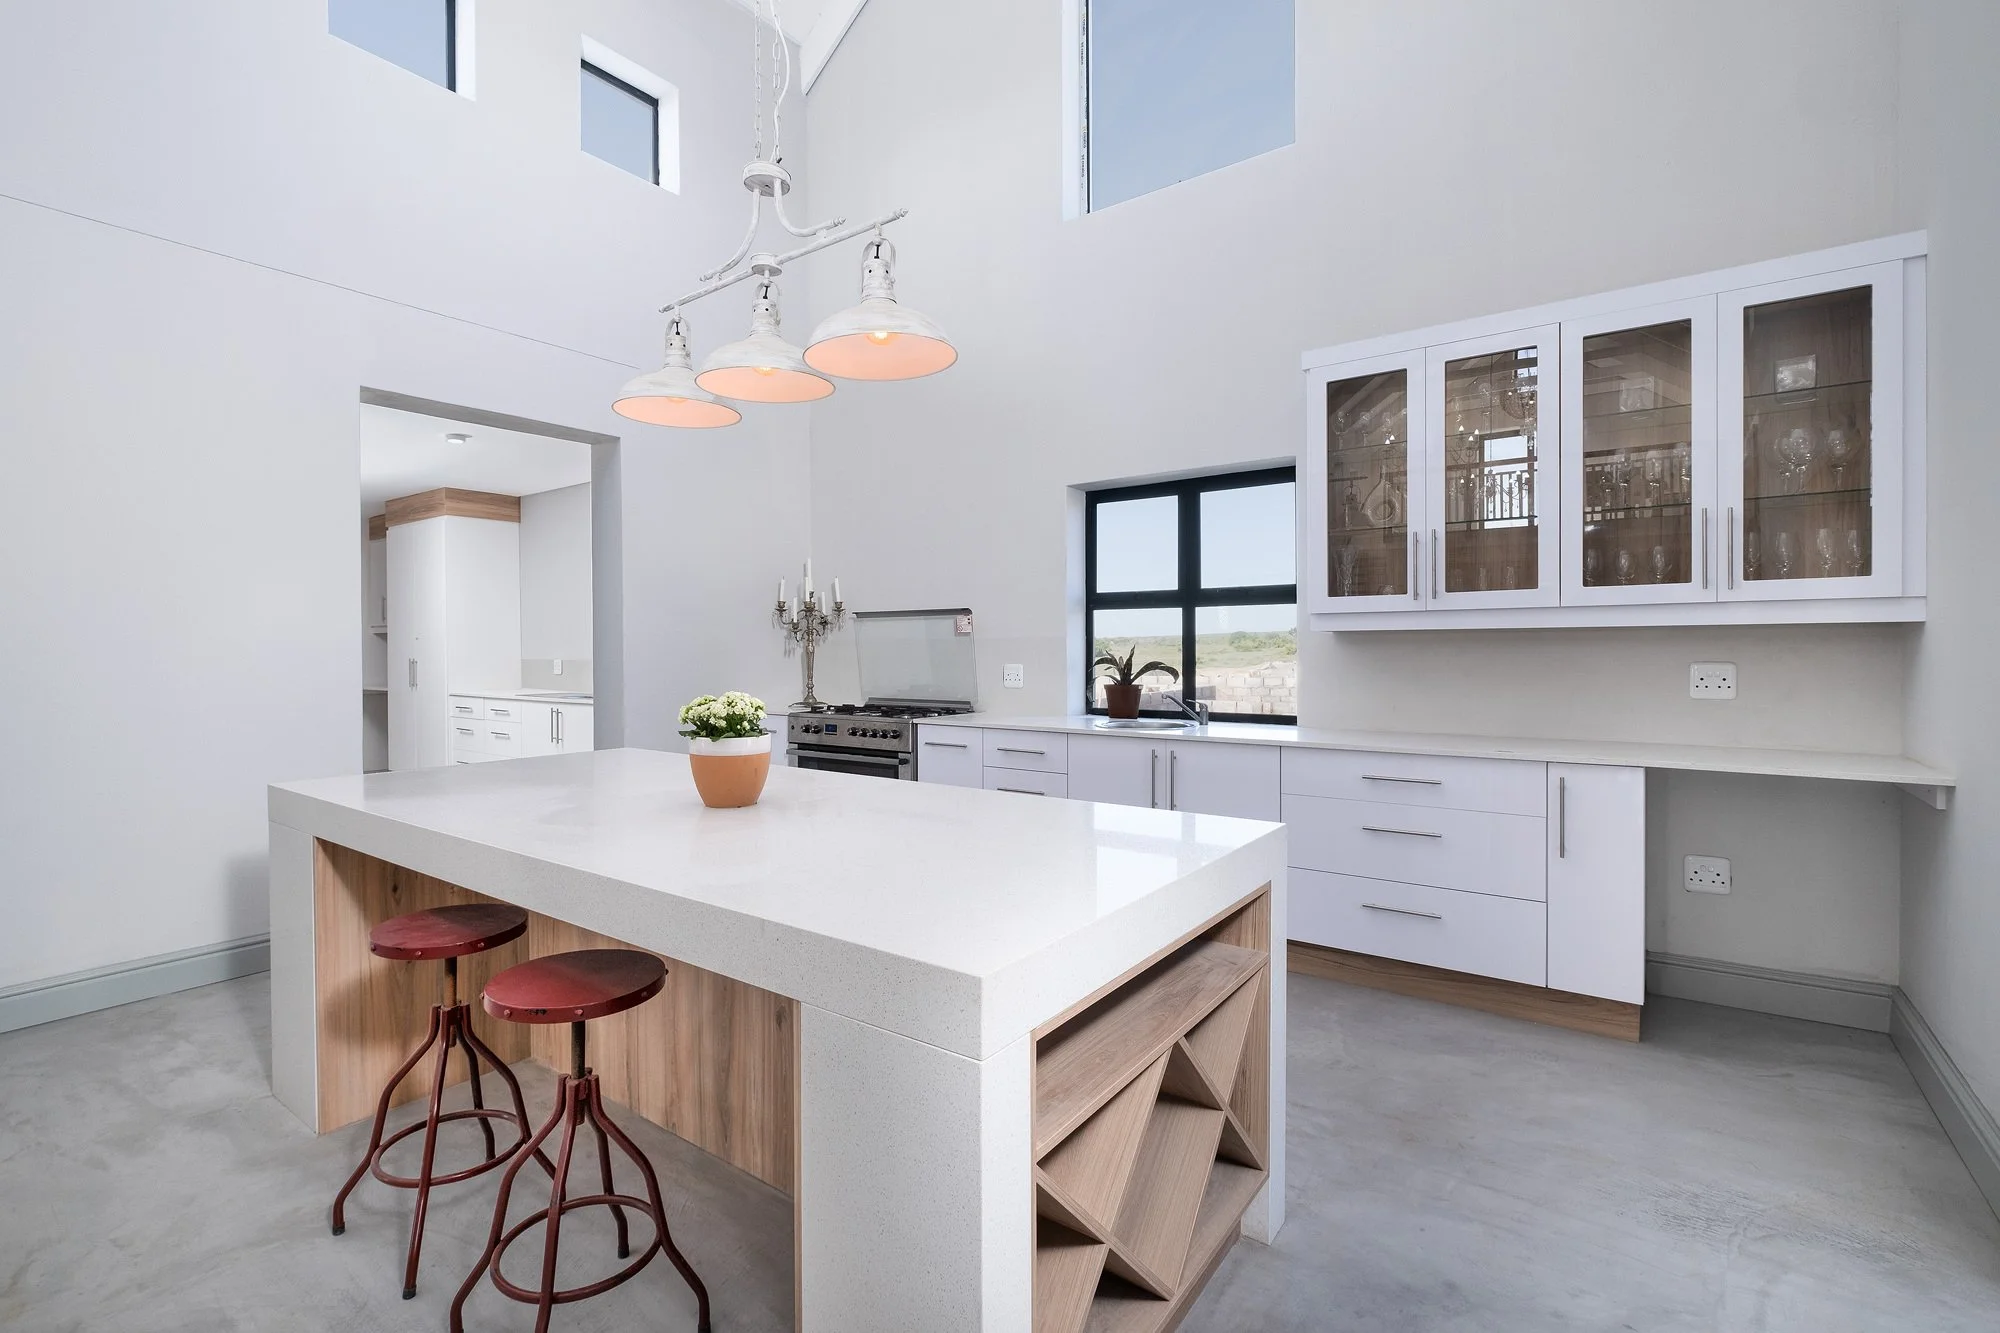
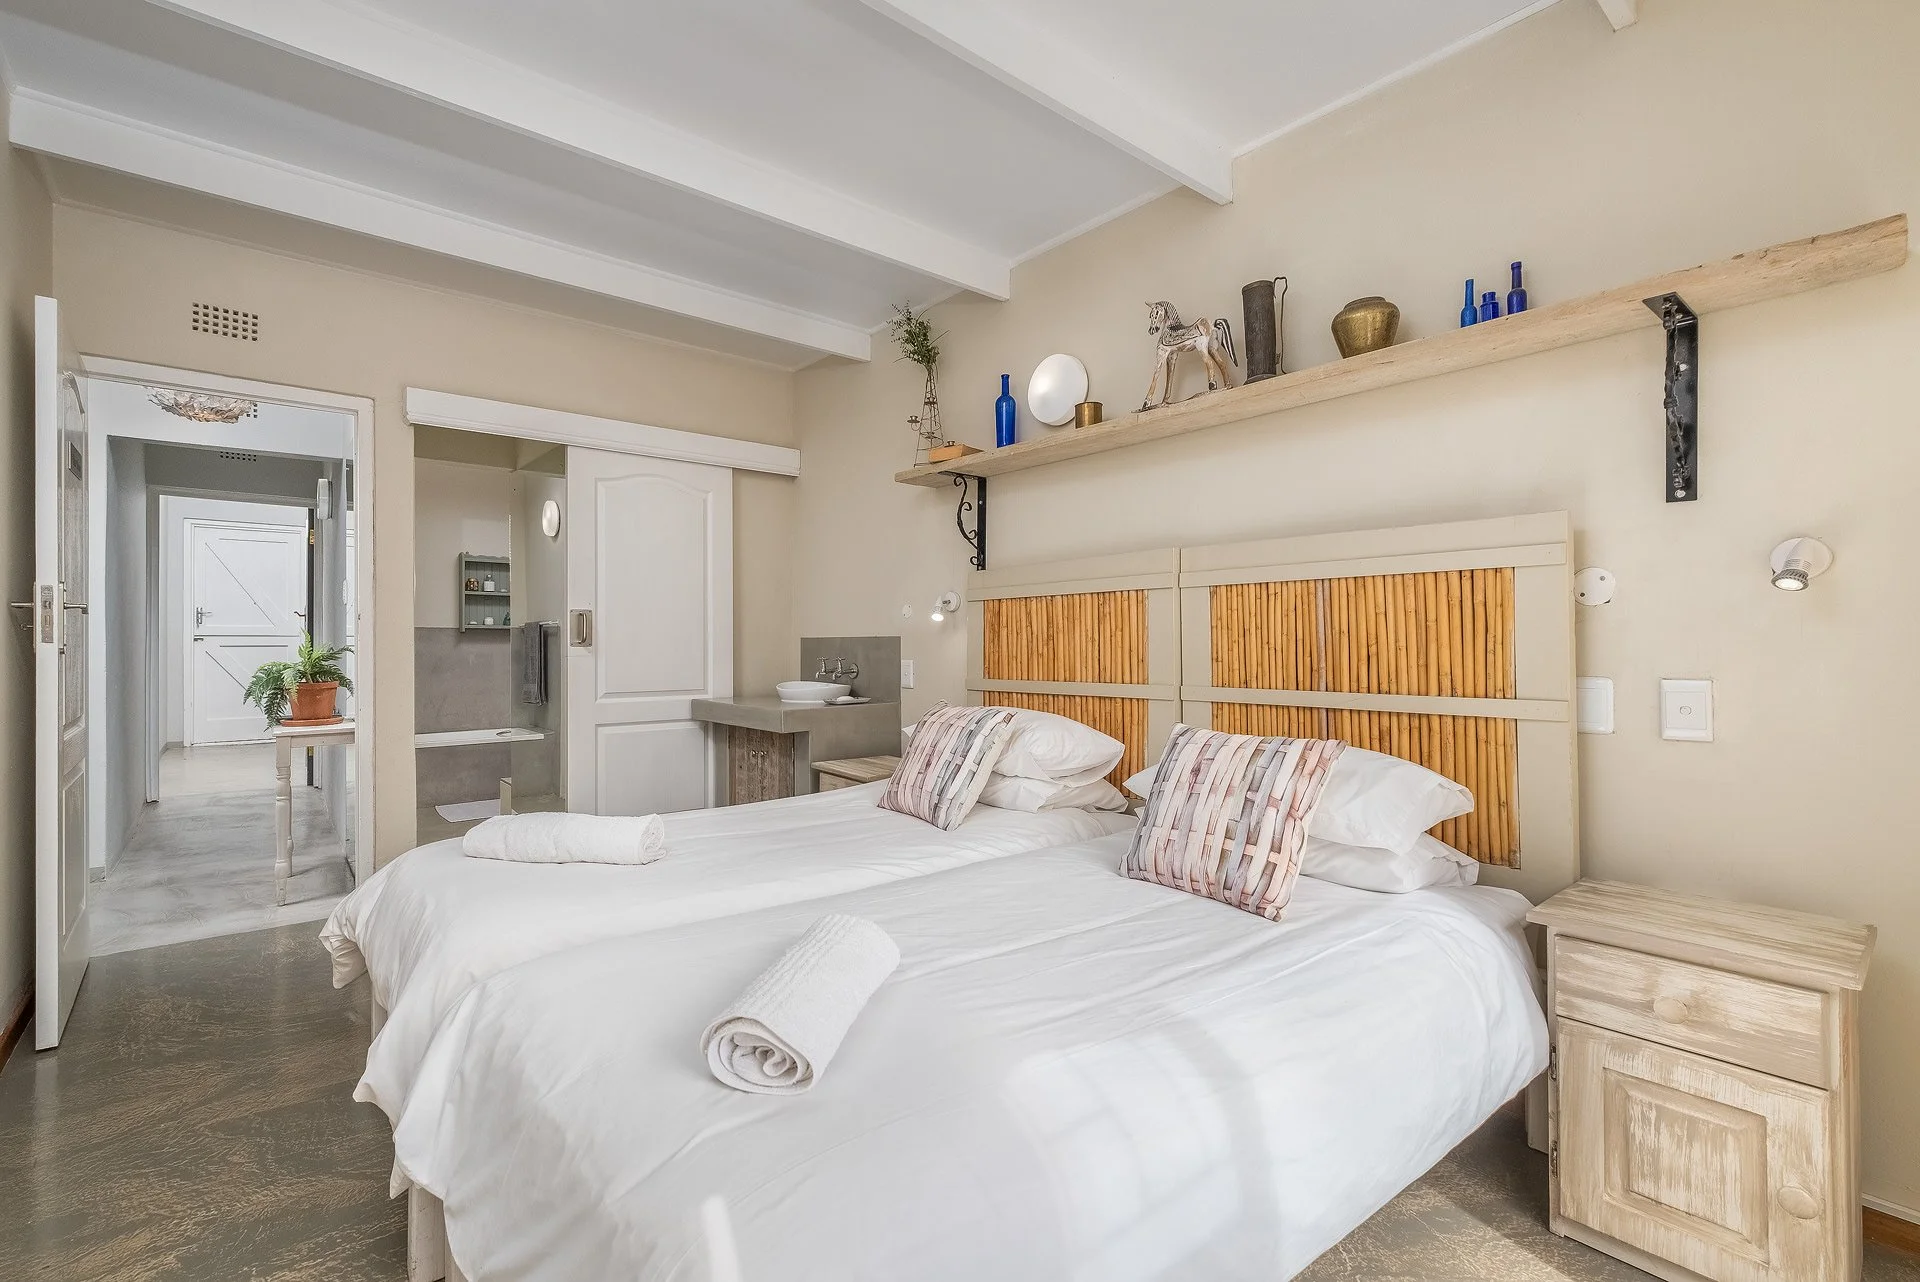
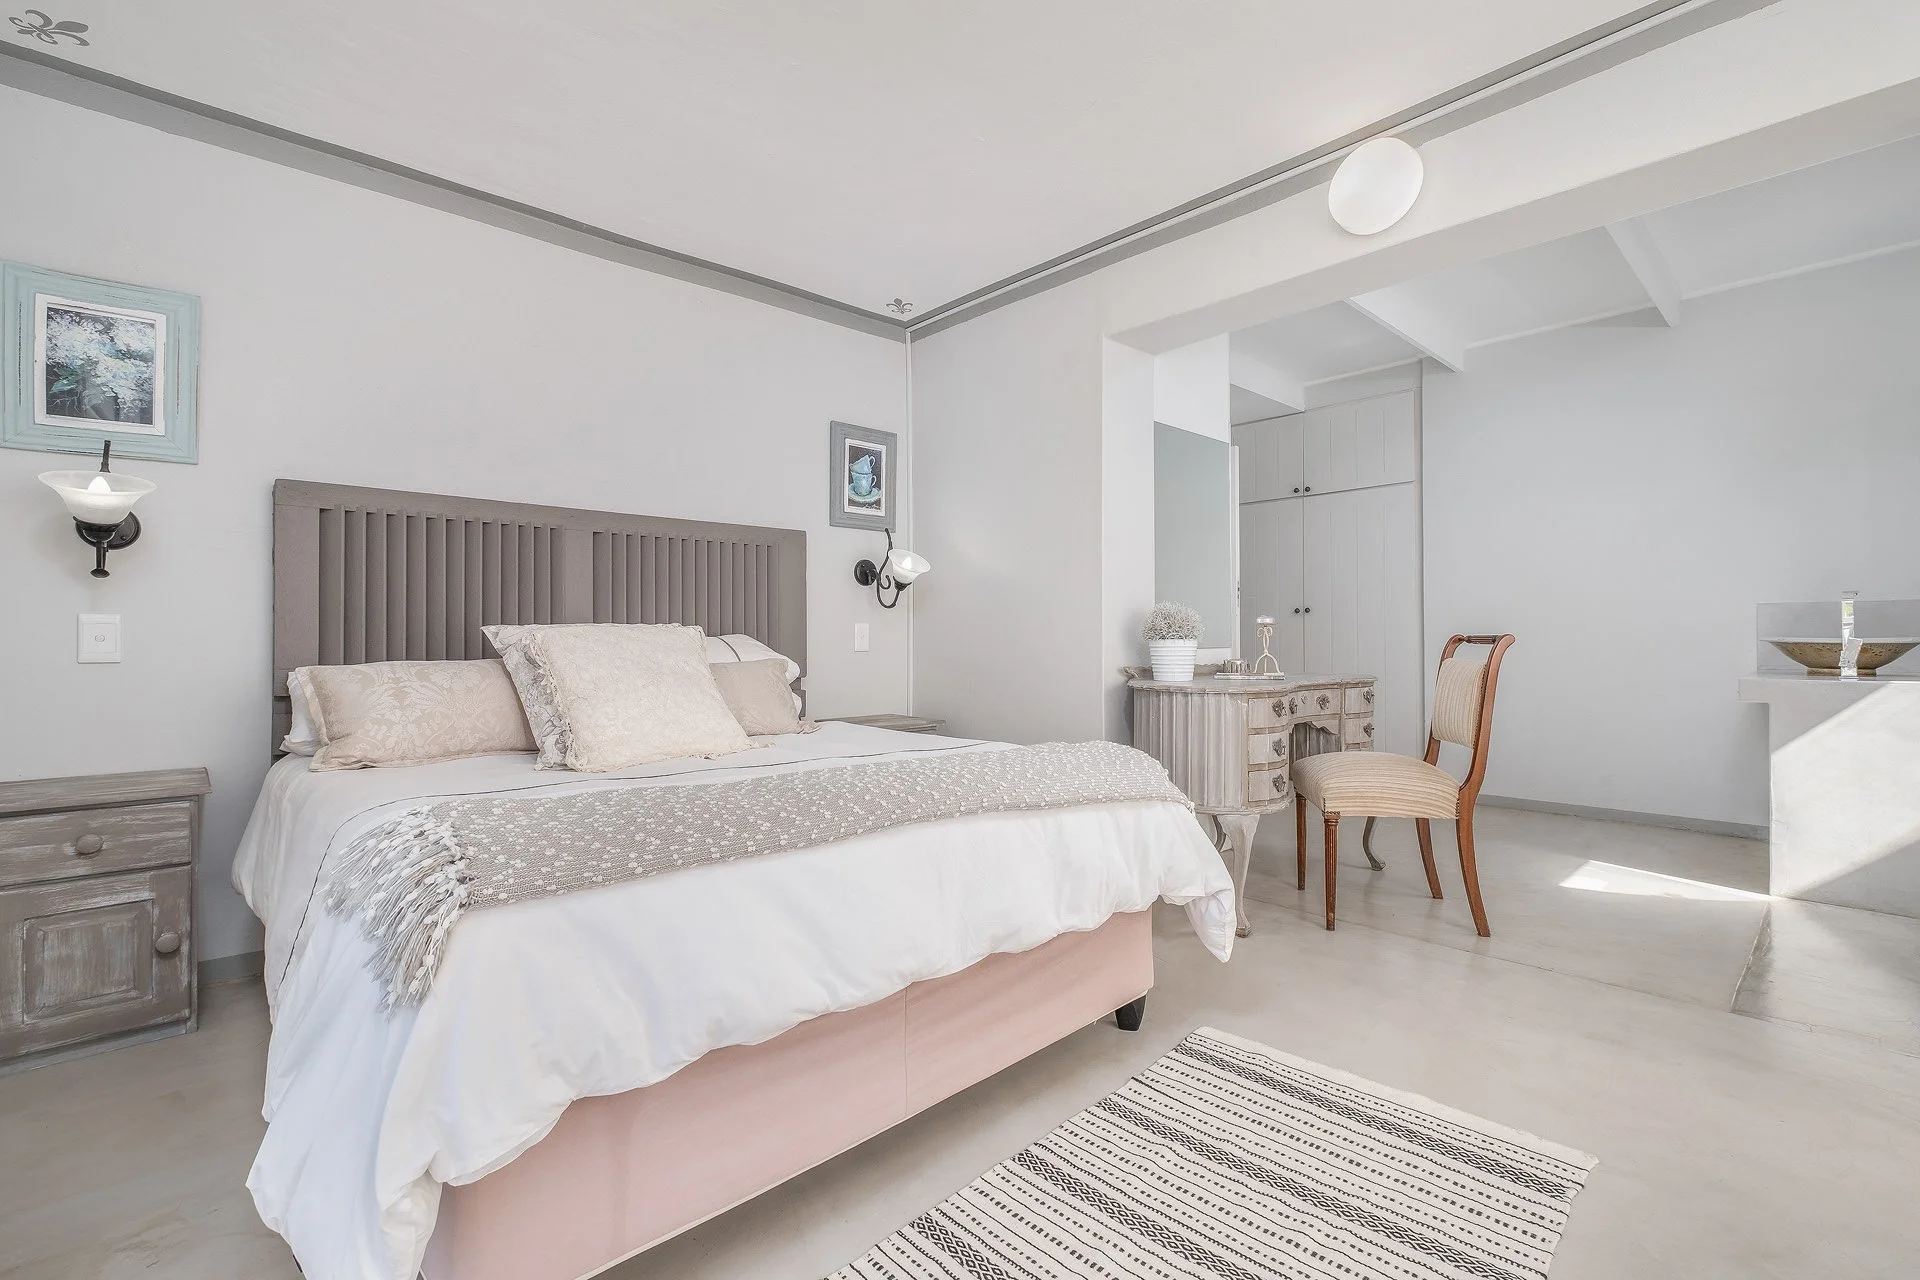
Real estate and landscape photography share many similarities. These two types of photography are similar in that they truly showcase our environmental surroundings. Both genres are often best captured through a wide angle lens, which allows for a broad viewing scope and an in-focus image throughout the whole scene. Lighting, understanding shadows from the natural light, and maintaining the lines of nature and buildings are all very important aspects in both cases.
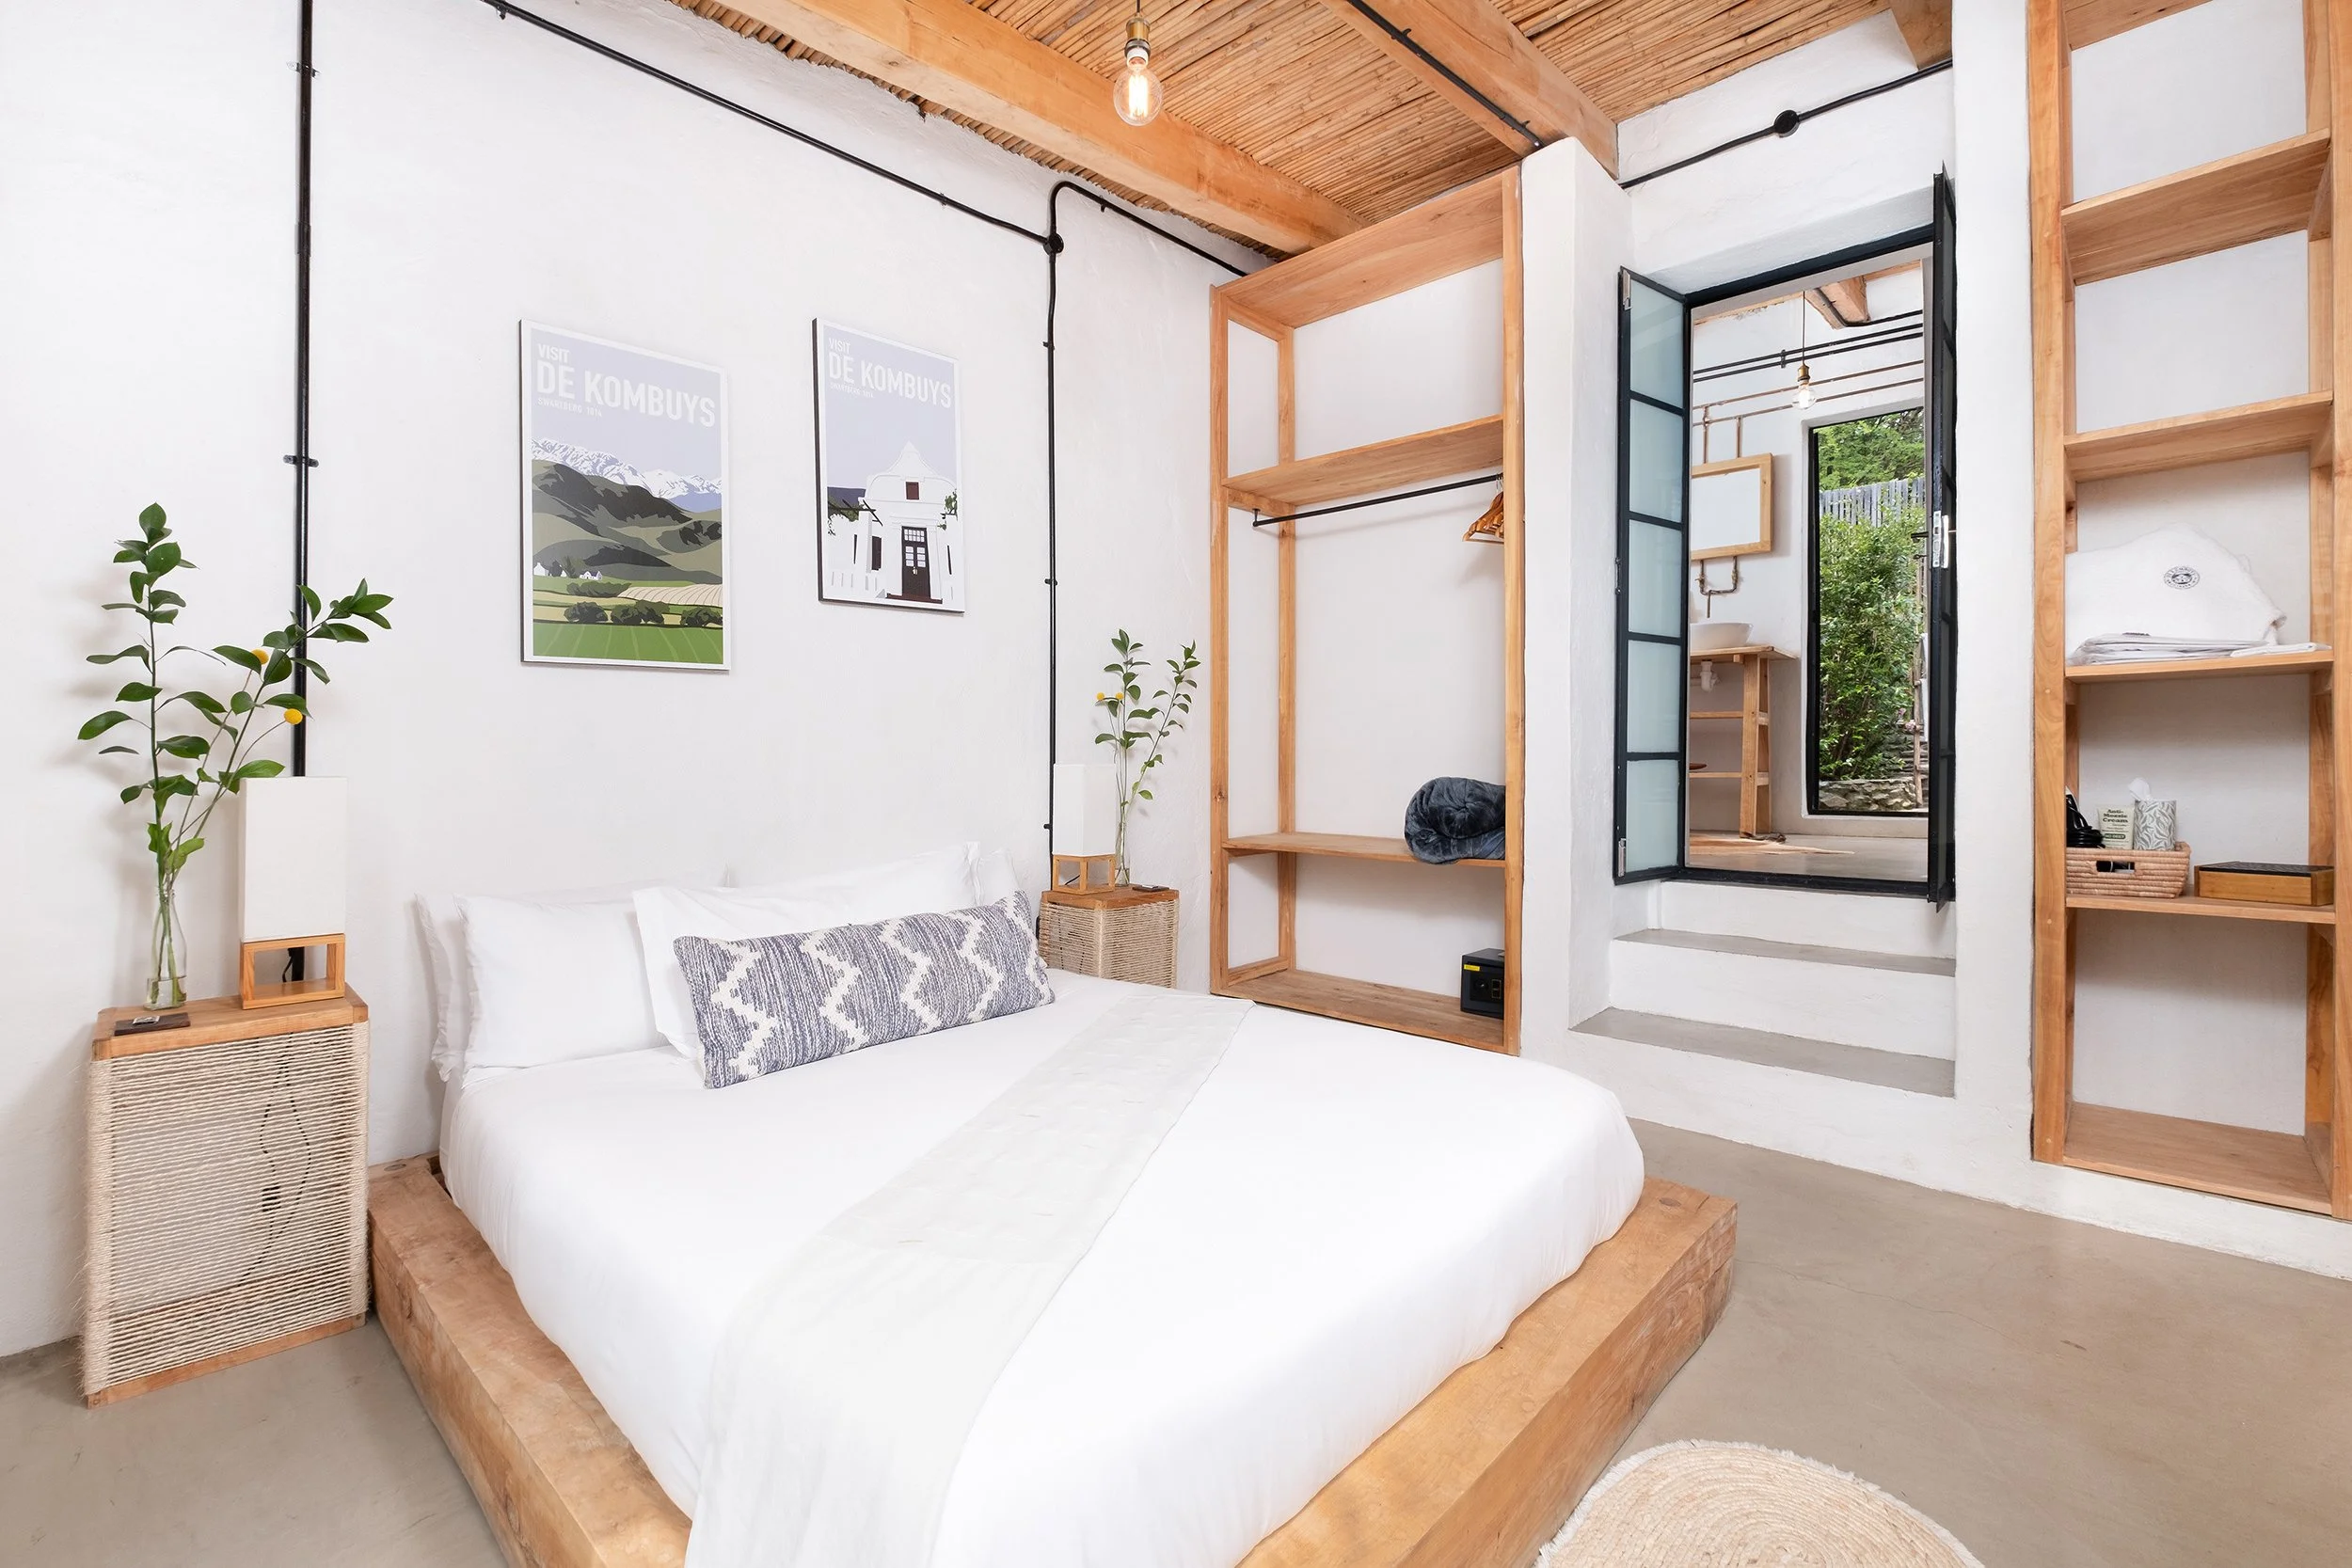
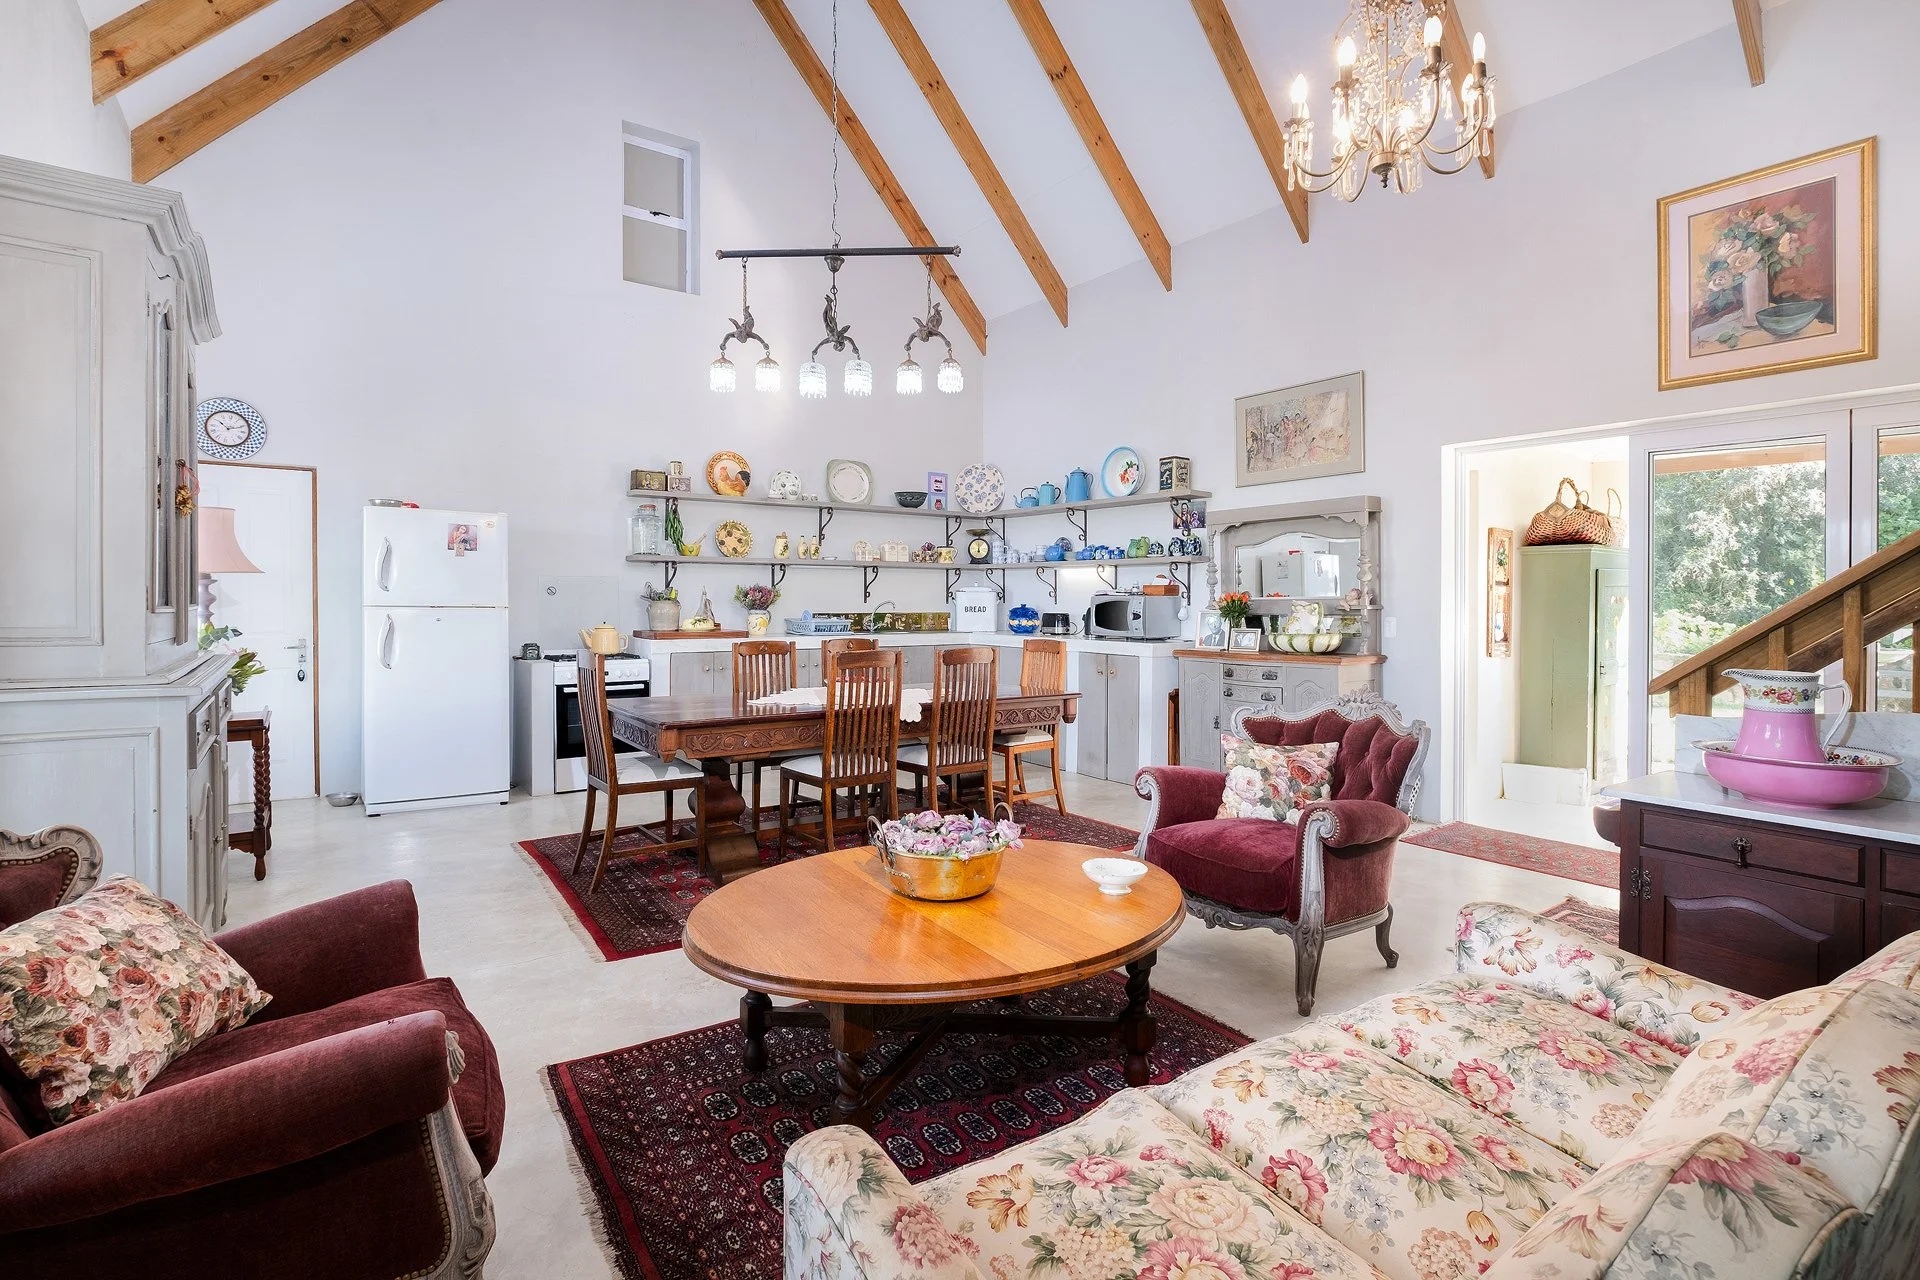
When searching for a real estate photographer, you’ll likely encounter many who claim they can deliver. There's however more to photographing living spaces than meets the eye. In order to help you understand what to look for in the genre of property / real estate photography, I've prepared these two images for comparison below.
Please click to enlarge and use the arrow keys (swipe on mobile) to cycle between the images to see the differences.

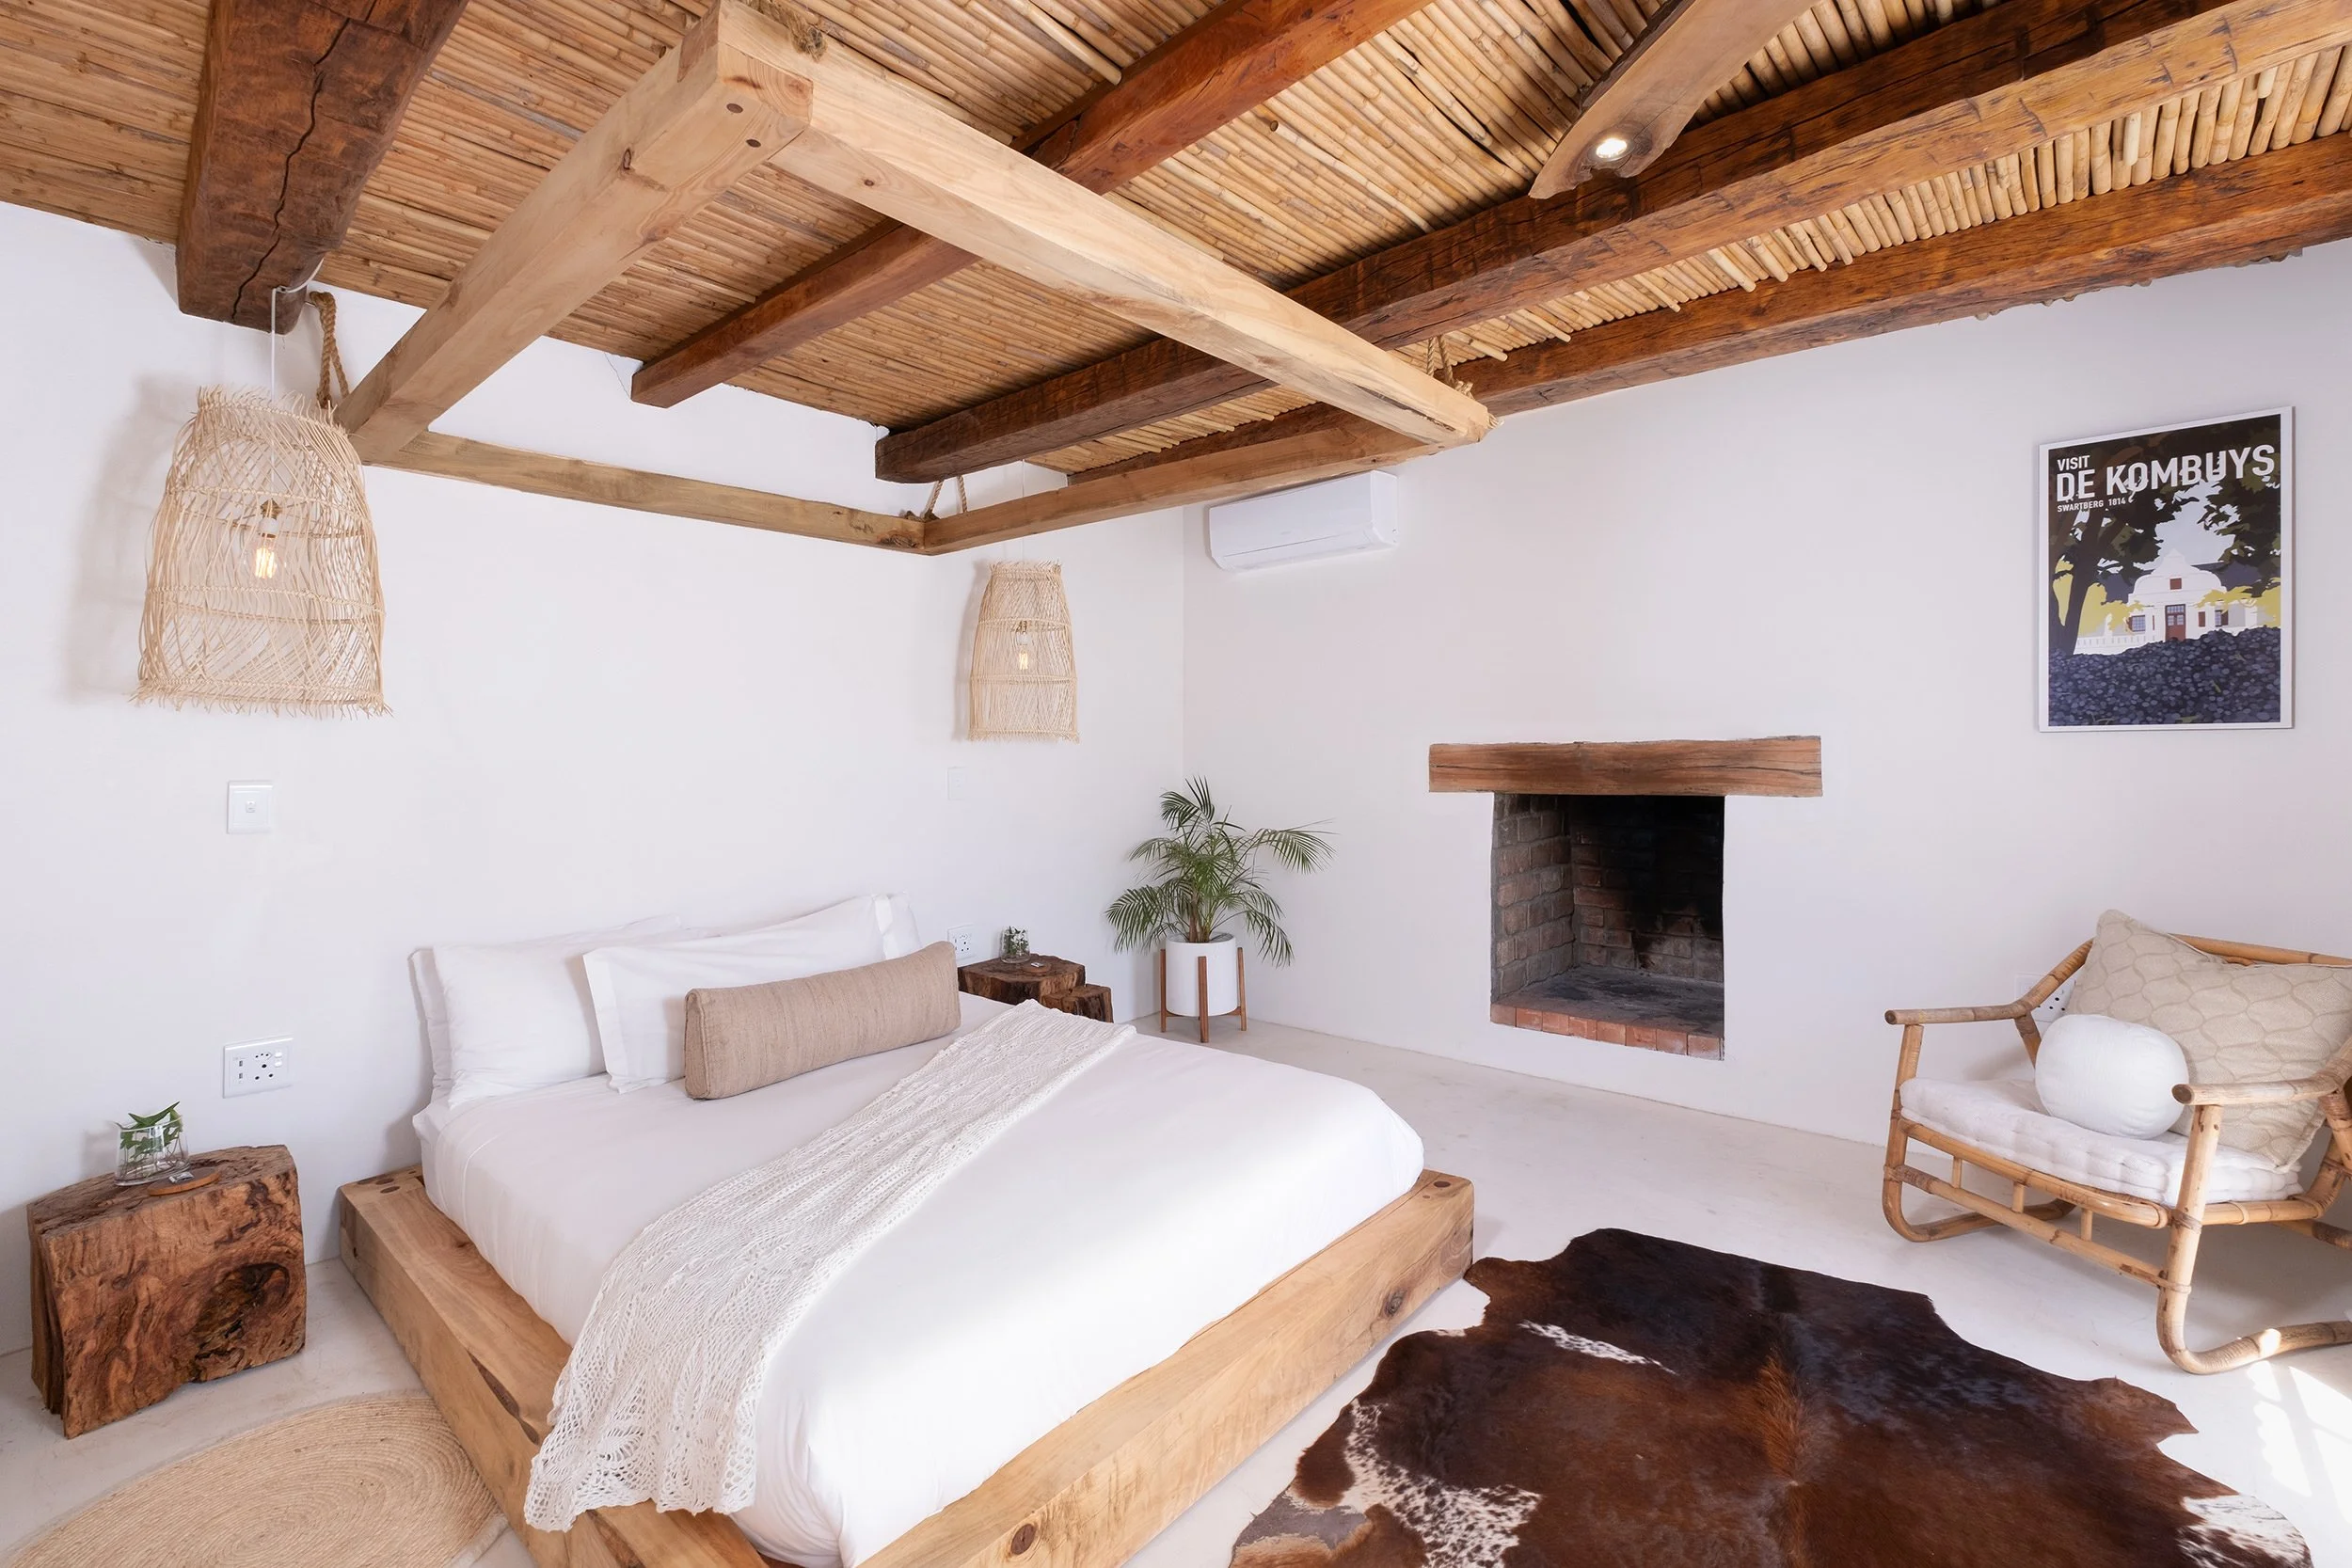
AMBIENT

FLAMBIENT
In the example above, the image on the left (ambient) is the result of a single exposure. The image on the right (flambient) takes a little more effort. It is achieved by blending three or more different natural and flash exposures together. By using this technique, called 'flash ambient' or 'flambient', we're able to combine the natural light in a room with an artificial light source. Often this is as simple as 'bouncing' a bare flash off the ceiling, but in certain situations additional equipment like light stands, umbrellas and soft boxes are needed to achieve the desired look. This technique should not be mistaken for HDR photography. HDR or High Dynamic Range photography is a process that involves taking multiple exposures ranging from dark to light and merging them together in post-processing. This process relies solely on available light and often suffers from inaccurate colour.
The first thing you'll notice in the left image is the colour cast (please note, colours will vary depending on your screen's calibration). The walls appear more magenta and yellow (warmer) than they actually are. By using flash, we're able to get rid of this cast and create a more colour accurate image that resembles what our eyes see in the room.
The next thing you'll most likely notice in the left image are the blown-out highlights and lack of details within the window frames. Our eyes are able to observe a larger dynamic range than the camera sensor. This means that when we stand in a room, we can easily see what's going on outside. Unfortunately the average modern camera is not able to achieve this in a single exposure. By using the 'window pull' technique, we can combine a flash exposure measured for the outside with other exposures measured for the interior. This is not necessarily required in every circumstance. There are times when we'd rather hide the outside if the scenery is less than desirable - then by slightly blowing out the highlights, the outside can remain partly hidden.
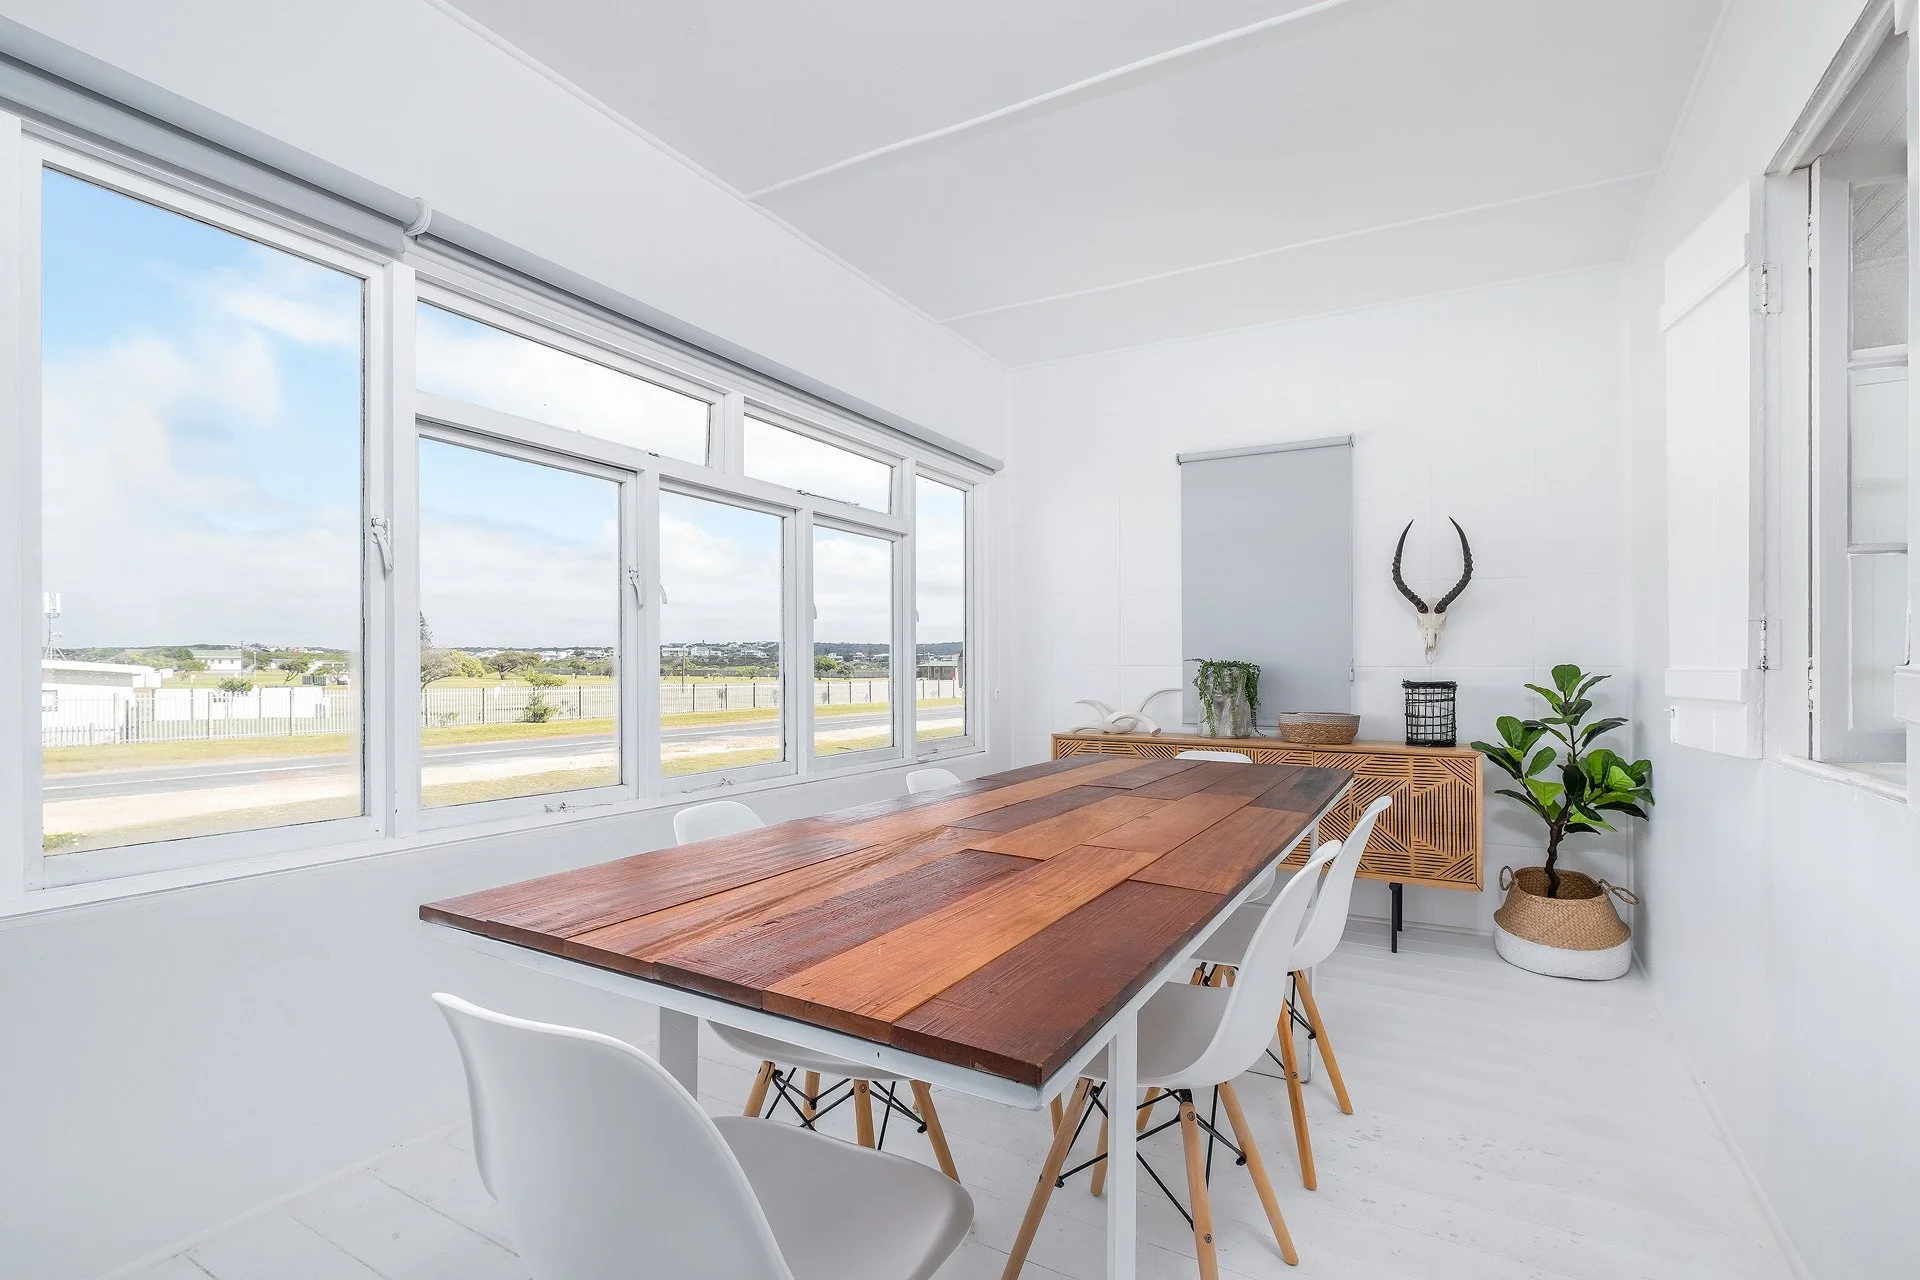
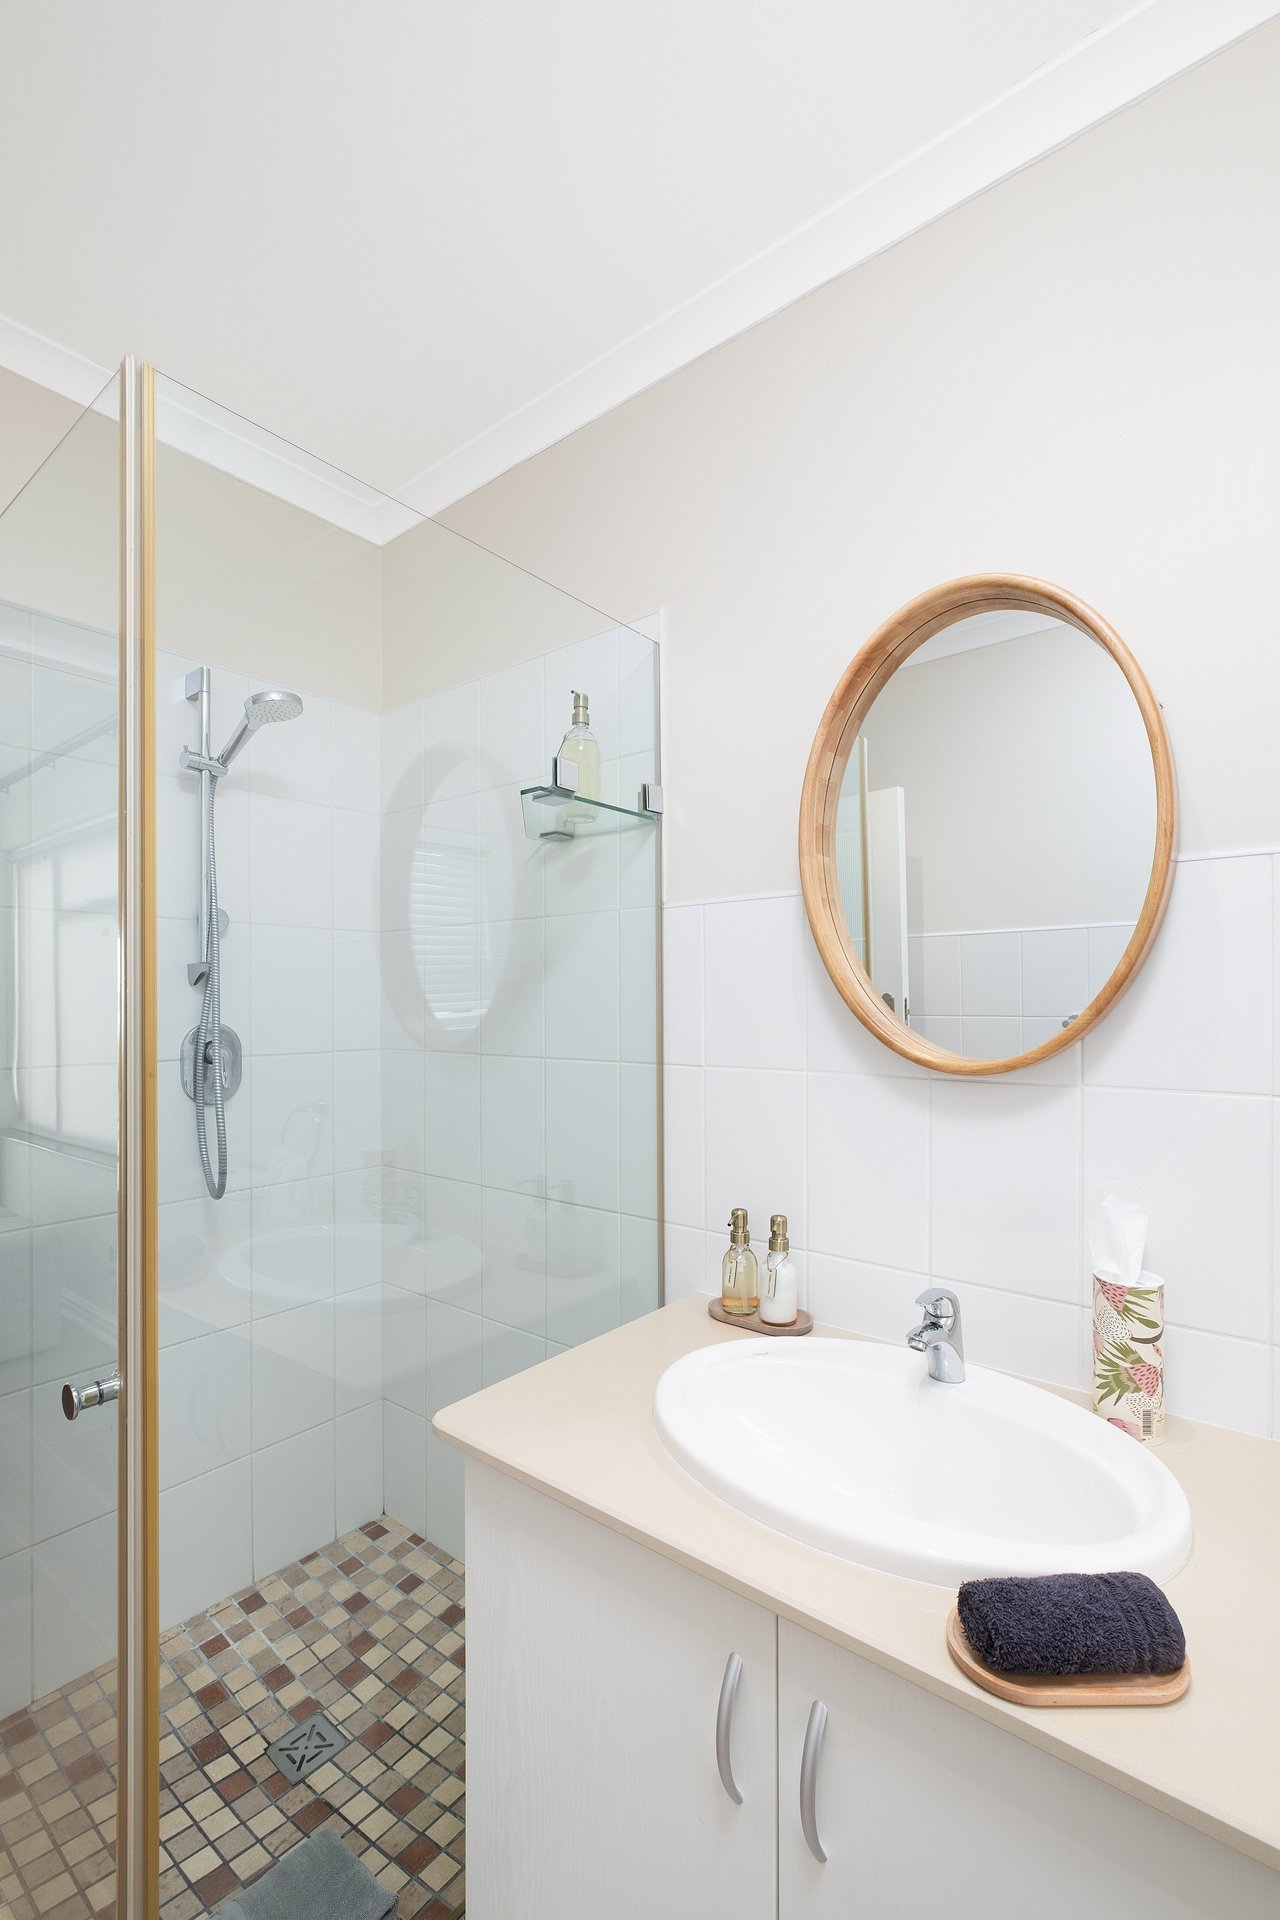
Another important aspect of real estate photography is vertical lines. It is essential to always keep your lines, especially those towards the edges of the frame as close to vertical as possible. In the example above, the wooden strips on the (viewer's left) side of the couch and the aluminium frame of the sliding door on the right act as good indicators.
There are of course many more qualities that make up a good real estate image. Attention to detail, showing a wide, but accurate view of the room and making sure everything is sharp and in focus are, among other things, imperative. On the other hand, hard unrealistic shadows, distortion, chromatic aberration / colour fringing, and noise are among the things to steer clear of.
I hope the example above enable you to get a better grasp of what to look for when deciding on which images to use and which should best be avoided. With all this in mind, I'm confident that I can provide clients with quality images that ensure the property is presented at it's best at first sighting.
Thanks for taking the time to read this far, I'd be happy to discuss your visual goals for each property. For further information, please refer to the FAQ and/or tips sections below. Feel free to get in touch through the website or contact me directly on 072 228 5015.


Frequently Asked Questions
-
Nicely presented things command higher prices. Have you ever noticed how much effort big companies put into packaging? To put it simply, my images will attract more potential buyers and your property will sell faster and quite possibly, for more. The first viewing isn’t the one where the buyer steps through the door, it’s the one where they see the property images online for the first time. We all know how important first impressions can be. Average photos will get some people to the door. Excellent photos will get more people to the door.
-
For my real estate photography services, pricing is tailored to the property size and specific project needs, with rates starting at approximately R650 per hour.
-
No, HDR or High Dynamic Range photography is a process that involves taking multiple exposures ranging from dark to light and merging them together in post-processing. This process relies solely on available light and often suffers from inaccurate colour. Although HDR has it's place and I may lean on it in certain situations, reliance on HDR as a substitute for proper flash equipment and technique is insufficient for commercial applications.
-
I firmly believe that the skill of the photographer carries far more weight than what’s in their bag. However, if utilised to its full potential, professional equipment will ultimately go a long way towards getting professional results. I use high-end Fujifilm cameras with wide-angle lenses. All work is done on a tripod. I also bring flashes, light stands, reflectors, umbrellas and a variety of other equipment to produce the best images possible.
-
The amount of time varies, depending on the size of the property. In general, the average home takes me about 2 hours.
-
This can be a lengthy discussion, please refer to the tips section below, where I put together some guidelines to help you prepare your property.
-
Generally, homes are more attractive if they are furnished or staged before the photoshoot. However, sometimes this is just not possible. Yes, I can still take photos of an empty house.
-
Yes, definitely. I'm often in different areas of our beautiful country. Please get in touch so we can discuss some possibilities.
-
Generally, lighting and post-processing techniques can offset the conditions of bad weather, but if your property has beautiful views and relies largely on the outside as a selling point, it would be best for us to reschedule our appointment.
-
You can generally expect the images to be delivered within 2 - 4 working days.
-
Again, this varies on the size of the property. The average 3 bedroom, 2 bathroom home can expect 20 - 25 images.
-
The images will be delivered via a WeTransfer link or another file sharing platform of your choice.
Tips for preparing a home for a photoshoot
My aim is to photograph your property in the best way possible. To ensure everything runs smoothly on the day of the shoot, I've put together some preparation tips of things to do prior the scheduled shoot. These are of course merely guidelines to make your property look its best and not requirements. Don't stress if all of them can't be met.
General Prep
Cleaning and staging should please be done before the photoshoot.
Use the garage for storage. Unless otherwise requested, I don't normally shoot garages, which makes them a great place to hide unwanted items.
Secure or remove pets. I love animals and have dogs of my own, but unfortunately they can be a distraction during a photoshoot. Although cats normally pose fewer problems than dogs, please secure them as well.
Plan not to be seen. All residents should plan on either being off the property or remain in areas where they can't be seen during the photoshoot. Rooms often overlap in images. People and pets can cause shadows and unwanted reflections.
Please communicate any special requests prior to the scheduled shoot.
Inside Prep
Declutter the kitchen. A few items on the counters are fine, but dishes, rags and sponges should best be put away. It's also a good idea to remove all pictures and magnets from the fridge.
If possible, place a bowl of fruit on the kitchen table or counter to add colour.
Declutter the bathrooms. Toothbrushes, razors and other personal items don't make for good photographs.
Turn on the lights. Please turn on all interior lights. If needed, please replace all burned out bulbs. This is critical.
Turn off all televisions and ceiling fans.
Make sure all windows and mirrors are clean and streak free.
Fluff and straighten pillows on sofas and chairs.
All bedrooms should have their beds made and items put away.
Hide the dustbins. They are often distracting elements in a photo. It would be best to just hide them in a closet or in the garage.
Hide cords and remotes. Of course this is easier said than done, but you will have more appealing images if you are able to hide any noticeable electrical cords.
Open all curtains. Open blinds with views. Your indoor photos will show outdoor views if there are any.
Clear all entryways. Please remove shoes, umbrellas and any other loose items from entryways.
De-clutter the home by removing cleaning supplies, magazines, toys, etc.
Outside Prep
Clear the vehicles. Please make sure no cars or boats are parked in the driveway. If at all possible, also remove cars from the street in front of the home.
Hide trashcans. Please move trashcans out of sight or into the garage.
Hide, or neatly roll up hoses. Please do this the day before the shoot, as hoses can drip water onto the pavement, leaving puddles in your photos.
Mow the lawn. Please make sure this is done at least 24 hours before the shoot.
Turn off the sprinklers. Do not water the garden on the day of the shoot, as this may also cause puddles on the pavement.
Clean and sweep driveways, sidewalks and patios Put patio umbrellas up and remove braai grill covers.
Clean up after the dogs. Please make sure there are no dog droppings visible in the yard.
Clean the pool and remove all covers.
Remove the for-sale sign.
Trim bushes, trees and plants to allow a clear view of the property.
Clean all patio / stoep furniture. Please dust and remove all cobwebs from outdoor furniture. Do not hose down on the day of the shoot, as again, this can cause puddles.
Twilight Prep
Turn on all exterior and interior lights. Please replace any burned out bulbs before the shoot.
If the property has a pool, please turn on all pool lights and remove any covers. This goes for water features as well.
Close all windows and roll up blinds to the same height.
Thank you for your time and patience to read through this list. If you have any questions, please feel free to get in touch.